
Howdy Sunshines! Happy New Year! I’m super happy to be back to blogging and I want to do so much much more of it, so thats exactly what I am planning to do!
For my first comeback piece I wanted to share with you an amazing new product I have come across for creating that much love ‘tousled’ beach wave effect. I have searched high and low for something which eliminates frizz, has staying power but also doesn’t give you that crunchy look. I love curls, but they don’t suit me quite as much, where as waves suit my face shape so much more. I researched a lot and studied tutorials about how to create this look and spent ages (still trying!) to perfect it.
So here is my attempt at a step by step guide on how to achieve this look. Separate post to follow about my make up look too! Love to know what you think and if it helps you!
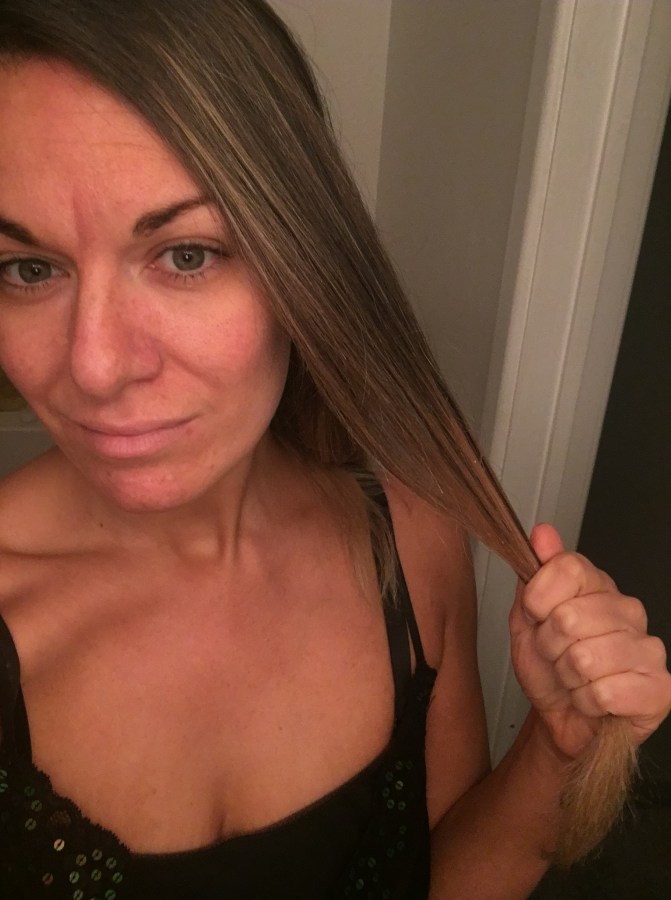
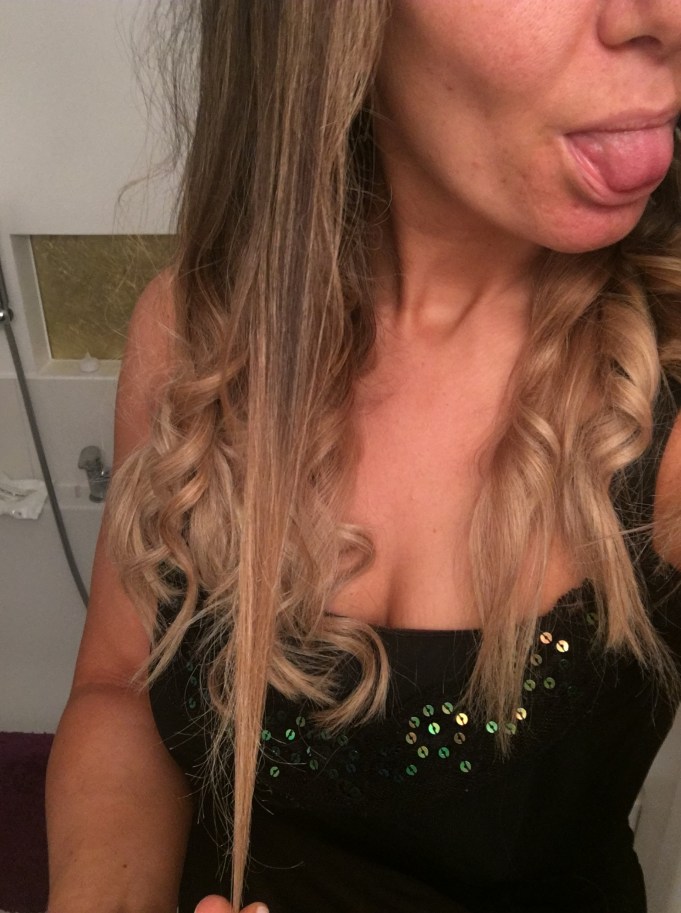
Step 1:
Get ready to go from frizz alert to fabulous!

Step 2
Give your hair a good brush to get rid of any frizz and so that it’s nice and smooth. Then take large sections of your hair. It’s important to take large sections as you don’t want the curls to be thin and ‘springy’. Taking a large section of hair will ensure that a wave is created rather than a curl.
Step 3
I use a Babyliss wand for creating these beautiful waves and finish off the look with a GHD IV Styler. A wand is great because it’s so versatile and can create so many different looks. To create this kind of wave, you want to start curling about 3 inches from the top of your head, as you dont want the curl to be springy from the top as it will create the wrong effect. The effect you want is to have a smoothness from the top and for the wave to then fall into itself all the way to the bottom. Point the wand downwards as you are curling it. (And yes, trying to take pictures of yourself whilst holding a hot wand is bleedy difficult – DO NOT TRY THIS BIT AT HOME!). Note cute fairy lights on the stairs!
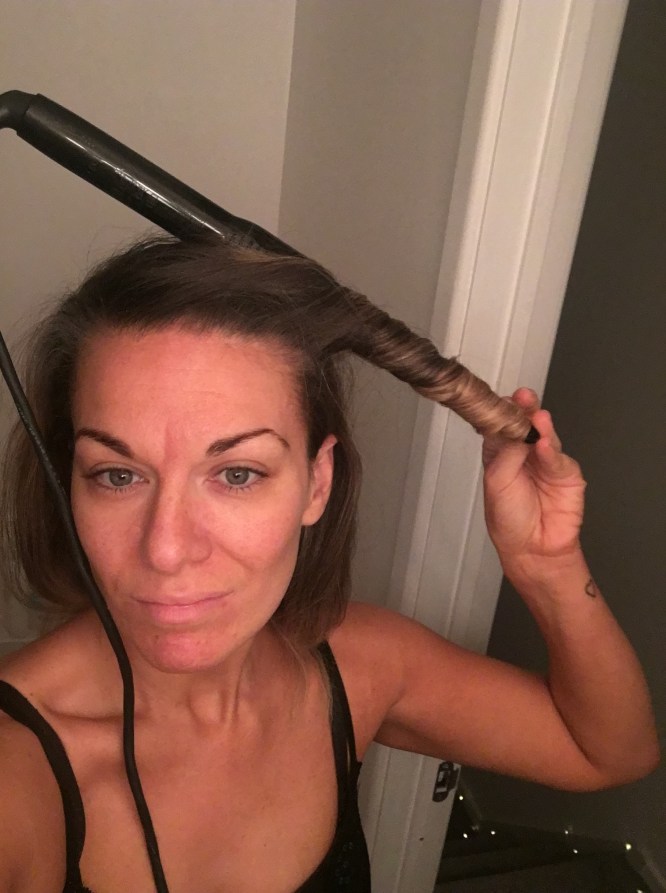
Step 4
When wrapping your hair around the wand, ensure that you leave about an inch long piece of hair at the bottom. Do not, repeat, do not, wrap the whole section around the wand. Leaving this bit of hair the bottom un-curled helps create the overall look.
Sounds strange but you’ll know what I mean when you’ve curled it.

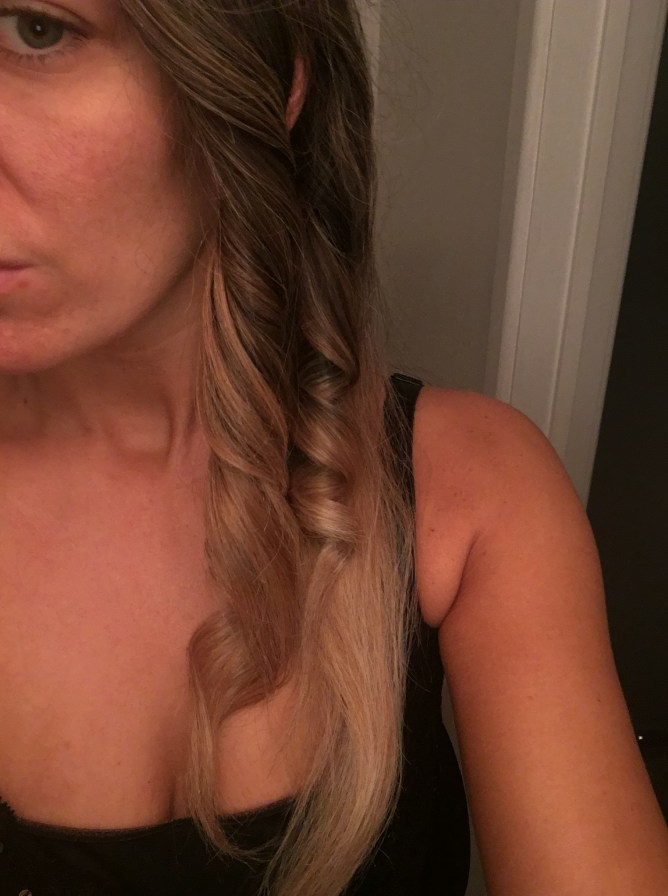
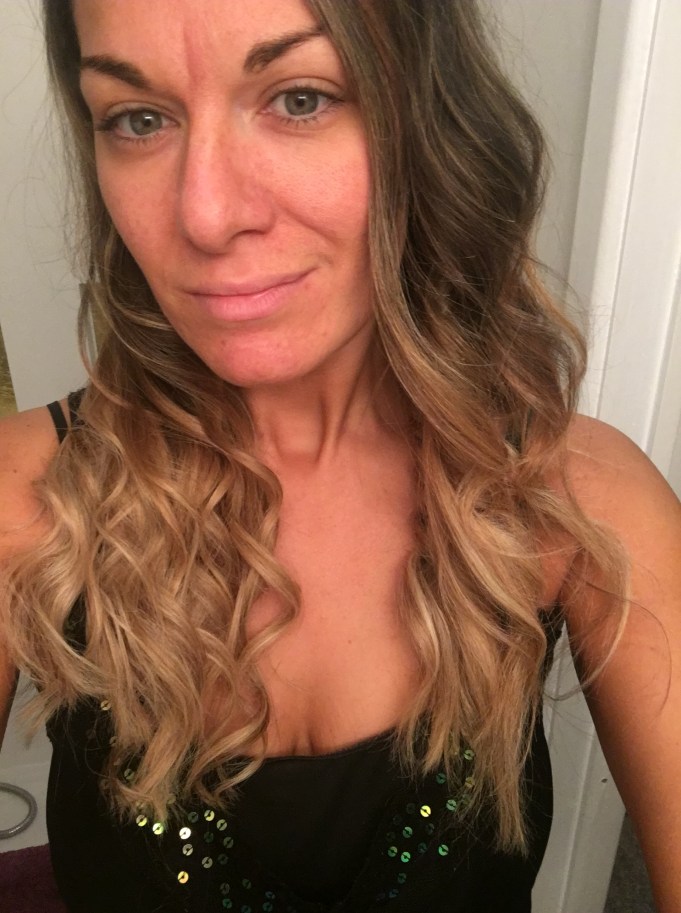
Step 5
This is the effect created! Beautiful waves rather than springy curls, giving a softer finish. By not curling that bottom bit of hair creates that loose finish that you need and adds extra bounce to the middle of the wave, rather than creating too much weight at the bottom of the curl.
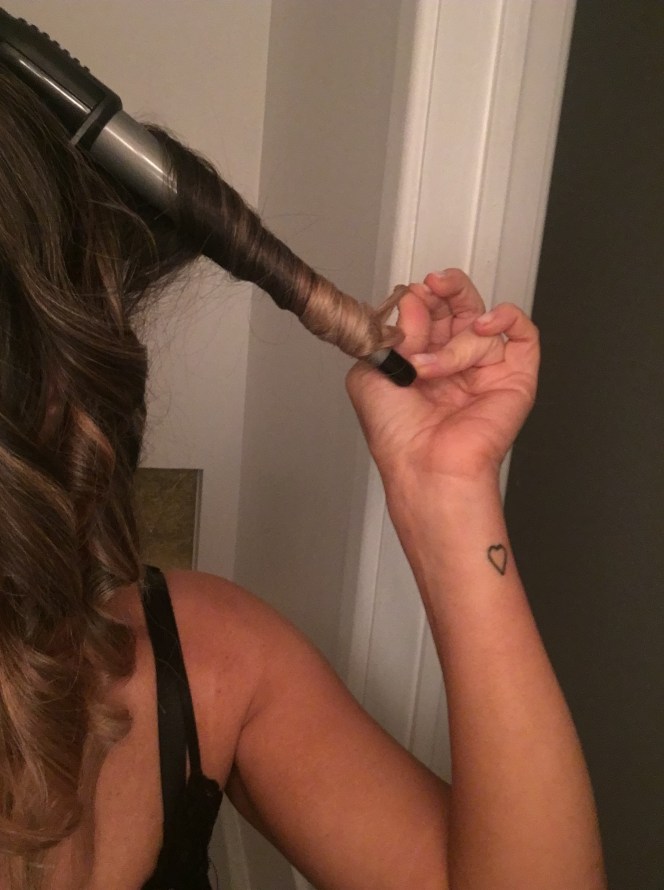
Step 6
Continue around your whole head, taking large sections as you go and smoothing where you need to. The bit at the end that you shouldn’t curl, secure it between your thumb and index finger if you can.
Step 7
Once you’re happy you have curled every section, run your fingers through the curls and ‘pull’ them down and smooth. Don’t be afraid to do this!
Step 8
The shot before the miracle product! The right side looks exactly like the wave effect I want and so I continue to ‘pull’ down and smooth the other curls down to look the same as this.
Step 9
The Piece De Resistance!
Now – this product! *Insert Hallulah emoji!” It gives completely the right effect for this look. As I’ve mentioned, it adds volume without crunch and gives that silky glow to your hair whilst smoothing it at the same time. It’s by Tresemme and called Make Waves Sculpt and Define Spray Gel from the their runway collection! I absolutely love it! It’s also fantastic for refreshing your hair if you are going from day to night.
I have used this so much over the Christmas period, especially for when I have after work drinks. I don’t even need to re-curl my hair, I just spritz this on and it instantly revitalises my hair and gives it that just prepped look. Here is the link to their website with the product details:
It deals with frizz, which is constantly a problem for me so another reason to love it! And therefore fantastic for controlling your hair in the winter. When it dries, it doesn’t have any stickiness and it smells really good without being overpowering. It also doesn’t ‘stiffen’ your hair, your waves still tumble and move around, but most impressively they don’t lose their shape and therefore 10/10 for staying power.
The biggest thing I love about this product (could there be any more!) is that it beautifully adds a glow to your hair. If you have colour in your hair like me, it brings out the colour and enhances it so that when the light hits your hair, the shine is amazing!
The bottle, packaging and branding are also a great eye catcher and look stylish on any dressing table.

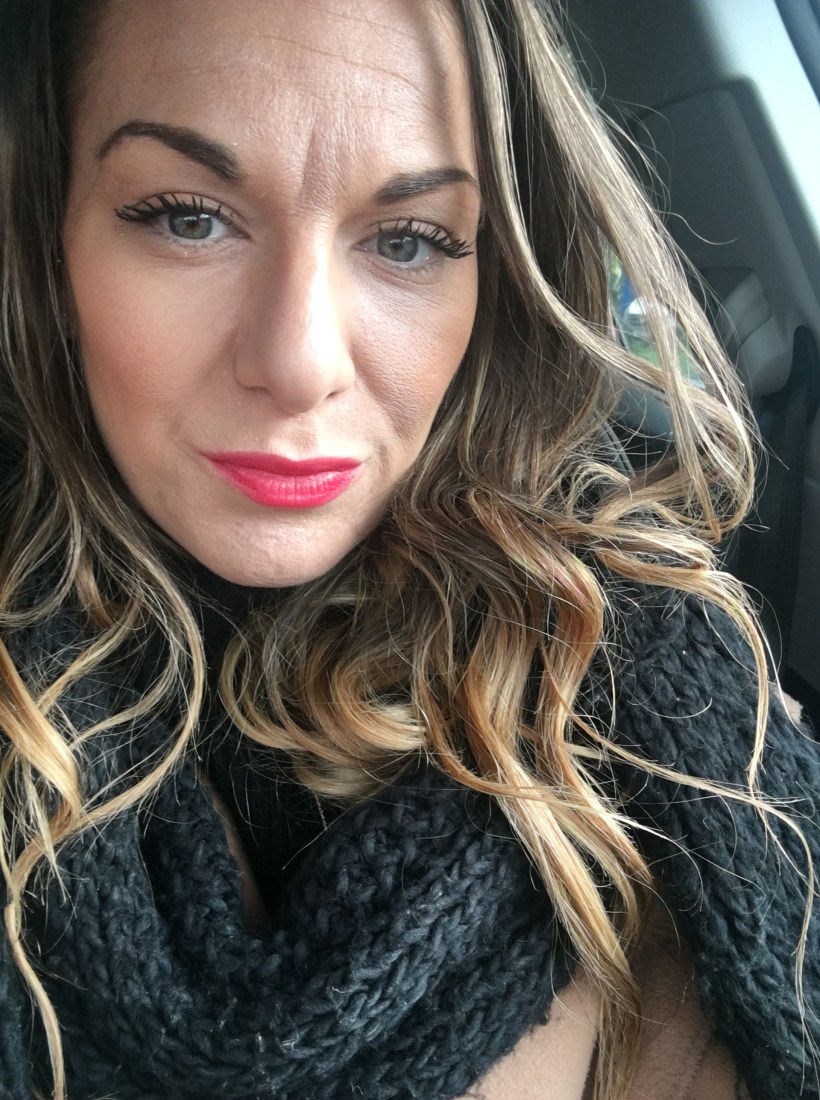
Step 10
Add some red lips and be fabulous!
When I use this product, I spritz at the front and continue around and push the waves ‘up’ at the same time to add volume. I also use the old skool technique of putting my head upside down and spraying all over add the back! I’m not joking! It really does work and adds extra volume, some classics always win!

READY! (15 minutes late, but pah! With curls this fab, they’ll forgive me!)

This product beings out the shine in your hair and the light reflects off beautifully.
Happy Waving!
Love Debs! Xo
Some outtakes – might be a fizz filled merry one too!


